How I built a VTAC shooting barricade
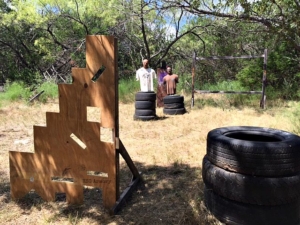
Viking Tactics came up with this great barricade to shoot through and around quite some time back, and I finally took the time to build one for my own range. It took me about 4 hours to make a pair, and I'm not an accomplished carpenter, by any stretch of the imagination. It's pretty simple once you get going, here's how I did it. Not sure why you should go to the effort?
As you can see, it forces you to assume positions that are difficult to get into and shoot from. Yes, it's not “realistic” because you'd never do exactly that. Drills are designed to isolate certain skills in order to improve them, before adding them back to the whole. Because we have limited capacity for learning, we need to break things down into bite size pieces before adding those skills to our toolbox.
Here's what you need:
- One sheet of plywood. Thicker wood will last longer and warp less, but I up-cycled an old sheet of 1/2″ and it's working well. This will make two barricades, if you're careful with your cuts.
- 2×4's, about 24′ long total, per side. You can get by with less if you must, but the plywood will warp sooner if you use fewer braces.
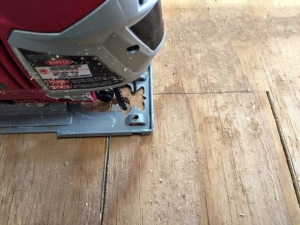
- Power saw. I started with a circular saw and finished with a jig saw. Skip the circular saw if you can.
- Drill.
- Drill bit that's larger than your jig saw blade.
- Wood screws and driver tip.
- Sandpaper is ideal, but not critical.
- Large square, or at the very least, some sort of straight edge.
- Eye and ear protection.
Using this diagram, mark your cuts. I started by using the circular saw, but should have just used the jig saw. Drill a hole on every other corner mark so that you can get the blade in.
Once you have cut the plywood in two, mark and cut the holes in one of them before marking the other. You can lay the first one on top of the second for a template. It's not necessary to be precise in placing the holes. The point is simply to have enough holes of different sizes, shapes and locations to make shooting through them a challenge.
Now that the plywood is cut in two and the holes are in place, it's time to add the 2×4's. Screw the vertical bracers on first and then add the feet and diagonals.
Lightly hit the whole thing with some rough sandpaper and if you want it to last, finish it with some paint. I was in a hurry to put it in use, so the paint will have to wait. 🙂
It's not complicated. If you have questions, I'm always happy to help out.
If you enjoyed this article, you might also like: How to make a rubber dummy target.


[…] It is very easy to practice shooting from a barricade with improvised support from home, all you need is some plywood and a support to keep the plywood upright. Here’s a short tutorial on how to make your own barricade. […]